Ralph J. Smit Laravel Software Engineer
The WordPress customizer is a great tool to add options to your WordPress theme so users can customize it. There are many frameworks that allow theme developers to add options to their theme, usually in a specific admin panel. Kirki is a framework that allows you to add controls to the customizer, in a simple, fast and easily maintainable way.
In this guide, I'm going to introduce you to Kirki and explain how it works. We'll also create several settings and demonstrate how they work.
Related articles
Eight reasons to Build Customizer Controls with Kirki faster
Step 1 – Installing Kirki
Because Kirki is a framework, it needs to be made available too. You can do this in two ways:
-
Include as a plugin from the WordPress repository
-
Embed in your theme
I'll discuss each option shortly.
Including Kirki from the repository
The first and easiest way to get Kirki, is to get Kirki from wordpress.org. Chances are that you already use something like TGM Plugin Activation to require plugins. Or you've written your own script.
Below is a snippet for including Kirki with the TGMPA library:
[ 'name' => 'Kirki Customizer Framework', //Full name 'slug' => 'kirki', //Sług 'required' => true, //Required],Learn how to use TGM Plugin Activation
If TGMPA seems useful to you, but you've never heard about it, check out my guide on using TGMPA with your WordPress theme.
Embed Kirki in your theme
1\. Download Kirki and put it in your theme
You can download Kirki from the WordPress repository. Extract it and put it into your WordPress theme. I put it in the folder assets/kirki/.
2\. Link to it from your functions.php
After Kirki is put into your theme, you'll need to link to it from your functions.php. This is really easy and can be done with the following.
locate_template('/assets/kirki/kirki.php', true, true);
Now we're ready to go!
Step 2 – Basic configuration
To configure Kirki, we're going to add a PHP-file in your theme. This file will contain all the controls and the basic configuration.
Create a file called customizer.php in the same directory as your functions.php and style.css.
Go to the functions.php and add the following snippet to load that PHP-file:
//Check if Kirki is activeif (class_exists('Kirki')) { locate_template('customizer', true, true);}
We first check if Kirki is active, otherwise you'll get a whole bunch of errors. After that we'll load the customizer.php file with locate_template.
Note: I prefer to use locate_template, because that allows a child theme to override the file and easily make some modifications to it. You can also use require_once or get_template_part.
Now go to the customizer.php file and open it. At the top, we'll add the basic configuration for Kirki:
<?php //KIRKI CONFIGURATION Kirki::add_config( 'theme_config_id', [ //Make sure to change the theme_config_id 'capability' => 'edit_theme_options', 'option_type' => 'theme_mod',] ); add_filter( 'kirki_telemetry', '__return_false' );
The Kirki::add_config() has two arguments: the theme configuration id and several options. For the configuration id, just choose a name specific to your theme. The options can take several arguments:
-
capability: this is a WordPress capability and takes care of user roles. More on roles and capabilities. -
option_type: choose betweentheme_mod(recommended) oroption. If you choose option, it's highly recommended that you know how the data is saved. If you don't know, choosetheme_mod. -
option_name(only foroption): If you're using options instead of theme mods, use this to specify and option name. All your fields will then be saved under that option name in the database. -
disable_output: set to true if you want to disable Kirki automatically outputting CSS. Only recommended if you have a specific goal in mind. Defaults tofalse.
If you choose for theme mods, you'll only need to add capability and option_type, just like I did.
Congrats! You've configured Kirki. Let's now add some fields.
Step 3 – Adding fields
The customizer consists of panels. Those panels contain sections. Those sections contain fields (or controls; settings). The panels are optional. So it's also possible to only have sections that directly contain fields.
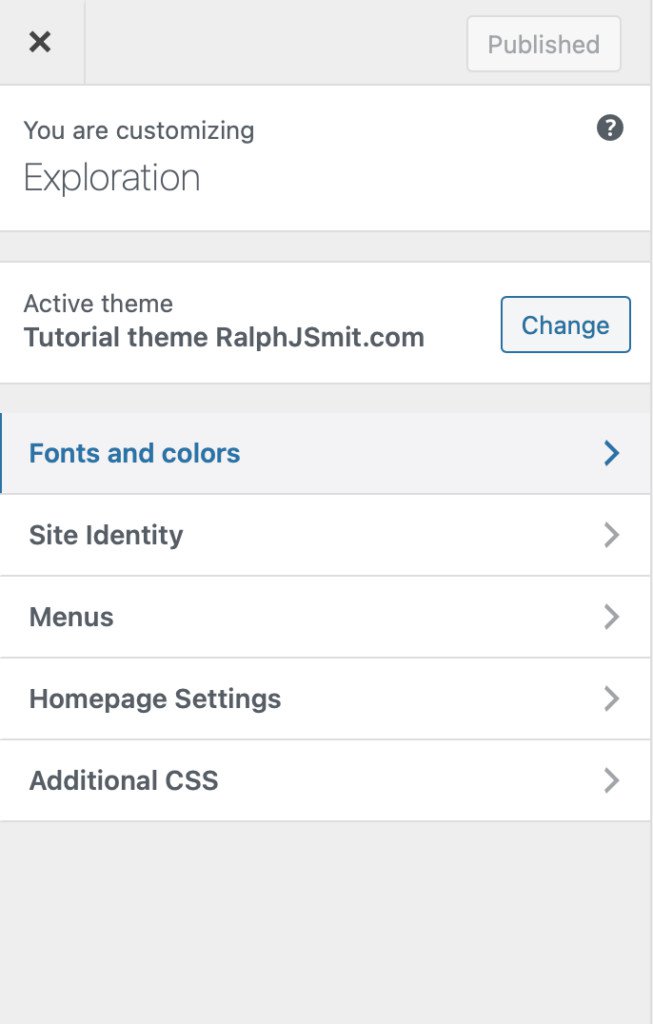
A panel and a section look the same way.

A sections contains controls. If it is empty, it will not be displayed.
Each field must be inside a section. In our example image, I first added a section, and second a typography control.
//SectionKirki::add_section( 'section_slug', [ 'priority' => 4, 'title' => esc_html__( 'Fonts and colors', 'text-domain' ),] ); //Typography controlKirki::add_field( 'theme_config_id', [ 'type' => 'typography', 'settings' => 'field_slug', //Can be used to retrieve value 'label' => esc_html__( 'Automatic Google Fonts control', 'text-domain' ), 'section' => 'rjs_demo', 'default' => [ 'font-family' => 'Noto Serif', 'variant' => '400', 'font-size' => '14px', 'line-height' => '1.5', 'letter-spacing' => '0', 'color' => '#333333', 'text-transform' => 'none', 'text-align' => 'left', ], 'priority' => 10, 'transport' => 'auto',] );
The above code takes care of everything needed. It registers a value in the database and takes care of the control itself.
How do we use this? If you weren't using Kirki, you'd have to manually make sure the CSS is outputted. But with Kirki, it's really easy:
'output' => [ [ 'element' => 'body', ],],
You just add this to your control and it'll output the font settings on the body element. Let's just see how this works out in practice. I have the following HTML, just as a demo:
<div class="kirki-demo" style="width: 80%; margin: auto; min-height: 400px; border: 50px orange solid">Welcome to Kirki</div>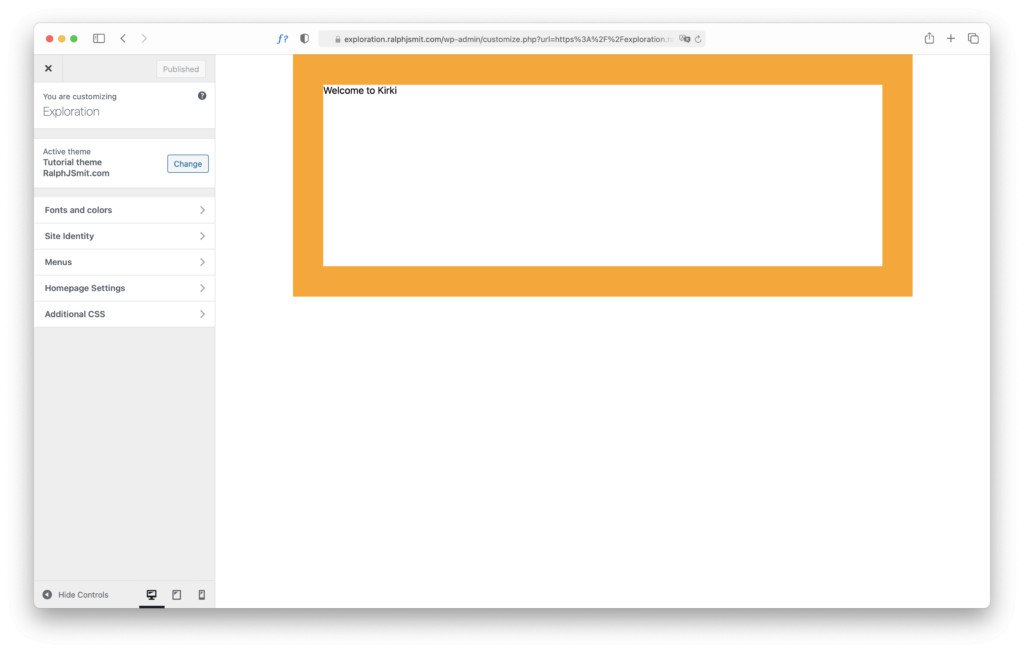
The example page.
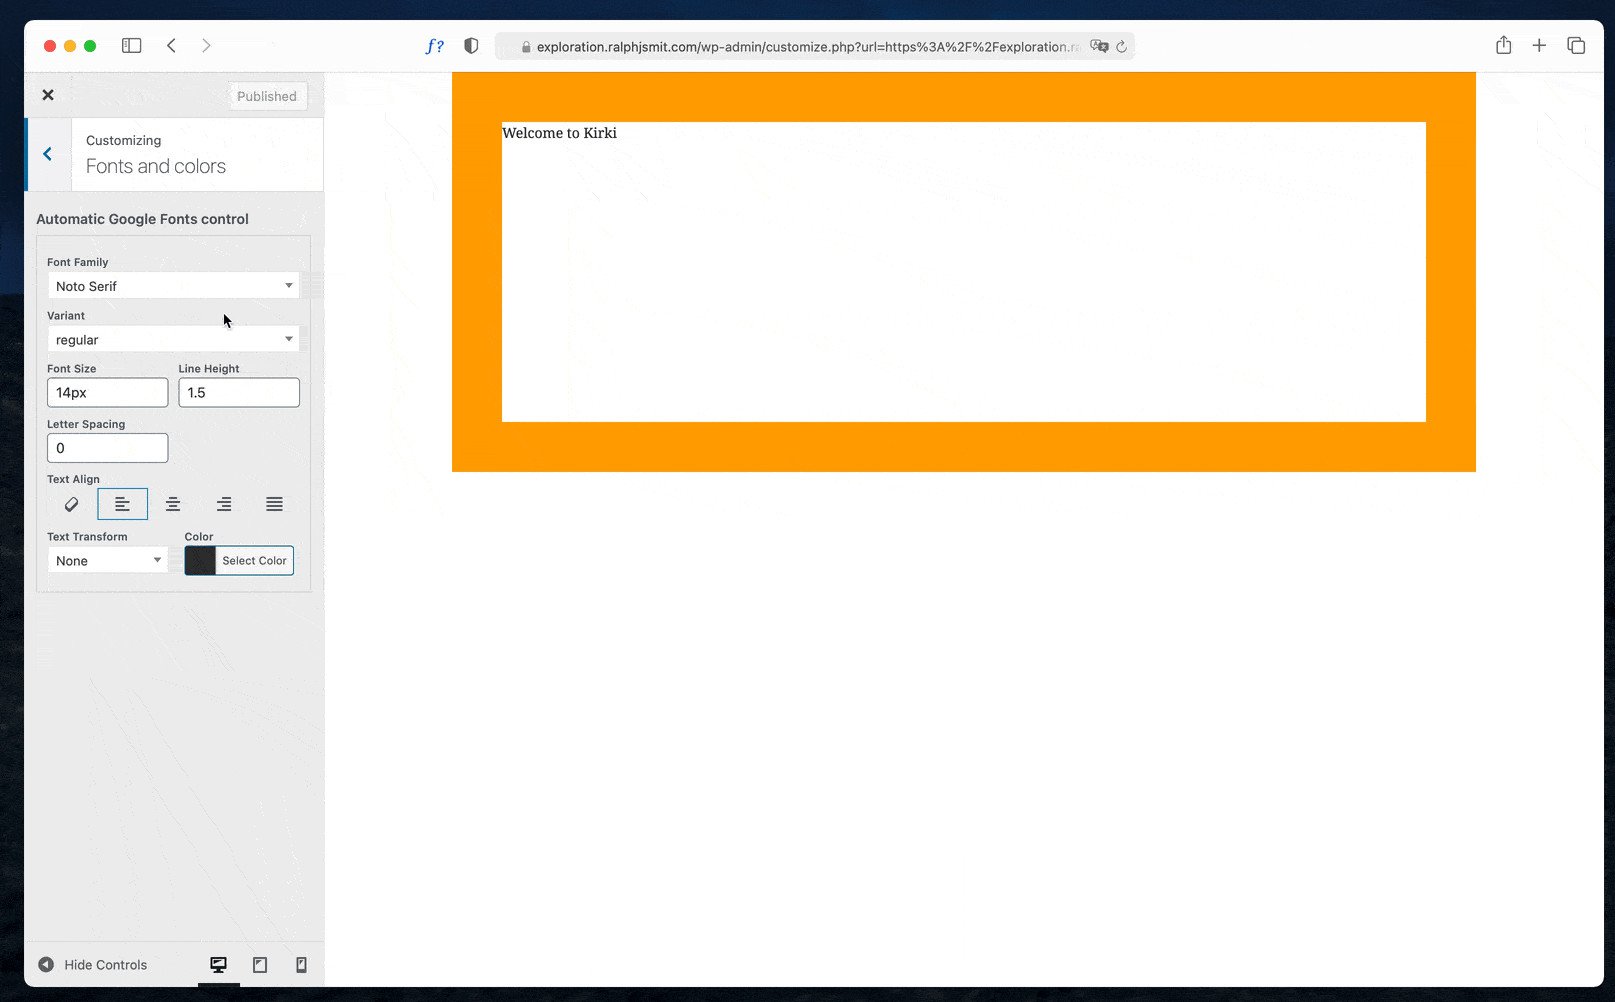
Let's now add our typography control:
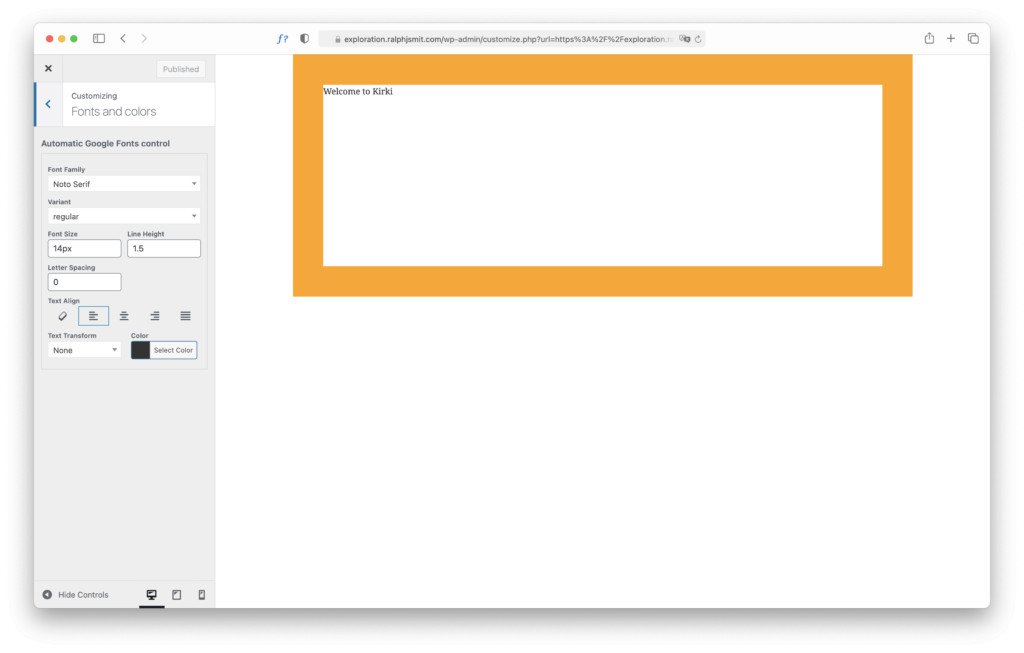
The layout with the typography control.
See the difference? The text has a new font. If we play with it, we can easily get the following result:
Kirki color controls
Now let's change the color of the border. We can accomplish this with the following CSS:
.kirki-demo { border-color: green !important; }
Let's add a color control. This goes mainly in the same way as the typography control.
Kirki::add_field( 'theme_config_id', [ 'type' => 'color', 'settings' => 'color_setting', 'label' => __( 'Border', 'text-domain' ), 'description' => esc_html__( 'Some cool description', 'text-domain' ), 'section' => 'section_id', 'default' => '#0088CC', 'output' => [ [ 'element' => '.kirki-demo', 'property' => 'border-color', 'suffix' => '!important', ], ],] );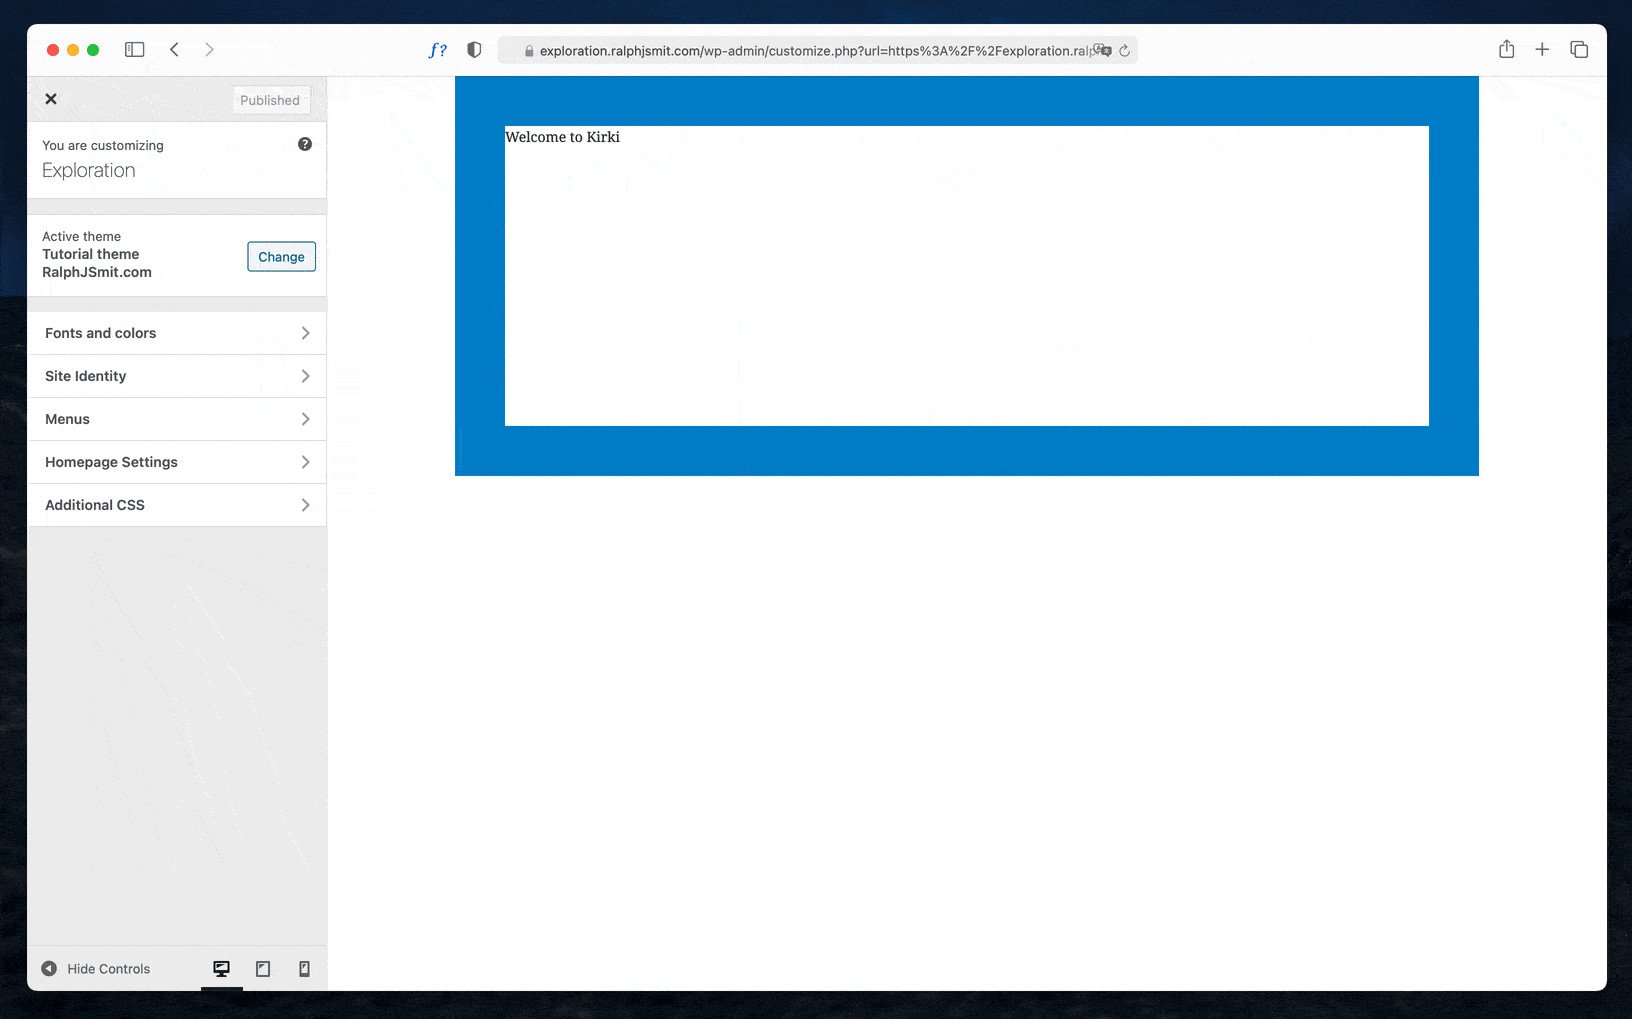
Changing the border color with a color control.
Wait.. what's that white flash? Well, the customizer always needs to refresh the preview with the news CSS. Then the preview flashes and the new CSS is applied. But, you're saying, why did the typography control not flash?
Well, that's because of this line:
'transport' => 'auto',
This line is for adding a postMessage script. It doesn't matter if you're not familiar with it, but it allows you to call a JavaScript function after saving this file. With this JavaScript function you can do several cool things, like updating the preview without refreshing it.
When you use the normal WordPress Customizer API, you'll always see this flash. Or you would have to hand-code some JavaScript solution for that with the postMessage functionality.
Luckily, Kirki already has that built-in with, so you don't have to do that anymore😉. Just change the value of transport to auto and Kirki automatically takes care of it.
Kirki text control
Is it also possible to change the text inside the box? Yes it is. For this, you have the text field at your disposal. Let's have a look how it works.
First, we'll add a field to the customizer:
Kirki::add_field( 'theme_config_id', [ 'type' => 'text', 'settings' => 'text_setting', //Setting slug 'label' => __( 'Text in box', 'text-domain' ), 'description' => esc_html__( 'Some cool description', 'text-domain' ), 'section' => 'section_id', 'default' => 'Default text',] );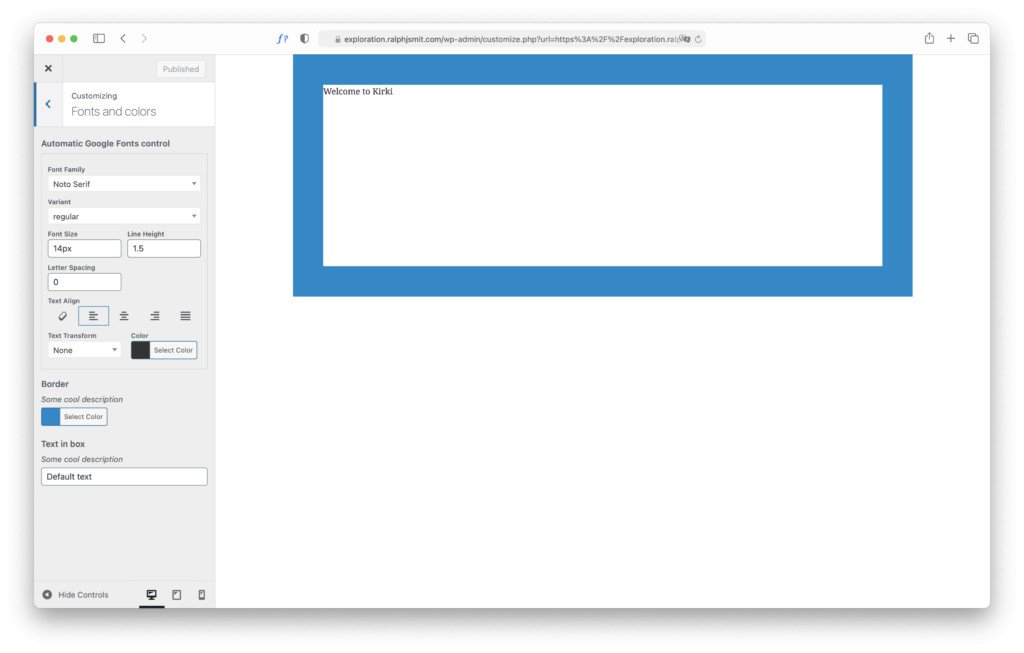
The Kirki text control.
How do we output this code inside our HTML? To do that, we'll go back to our PHP-file with our HTML inside.
<div class="kirki-demo" style="width: 80%; margin: auto; min-height: 400px; border: 50px orange solid">Welcome to Kirki</div>
Let's write some PHP to replace the default text with the dynamic text field.
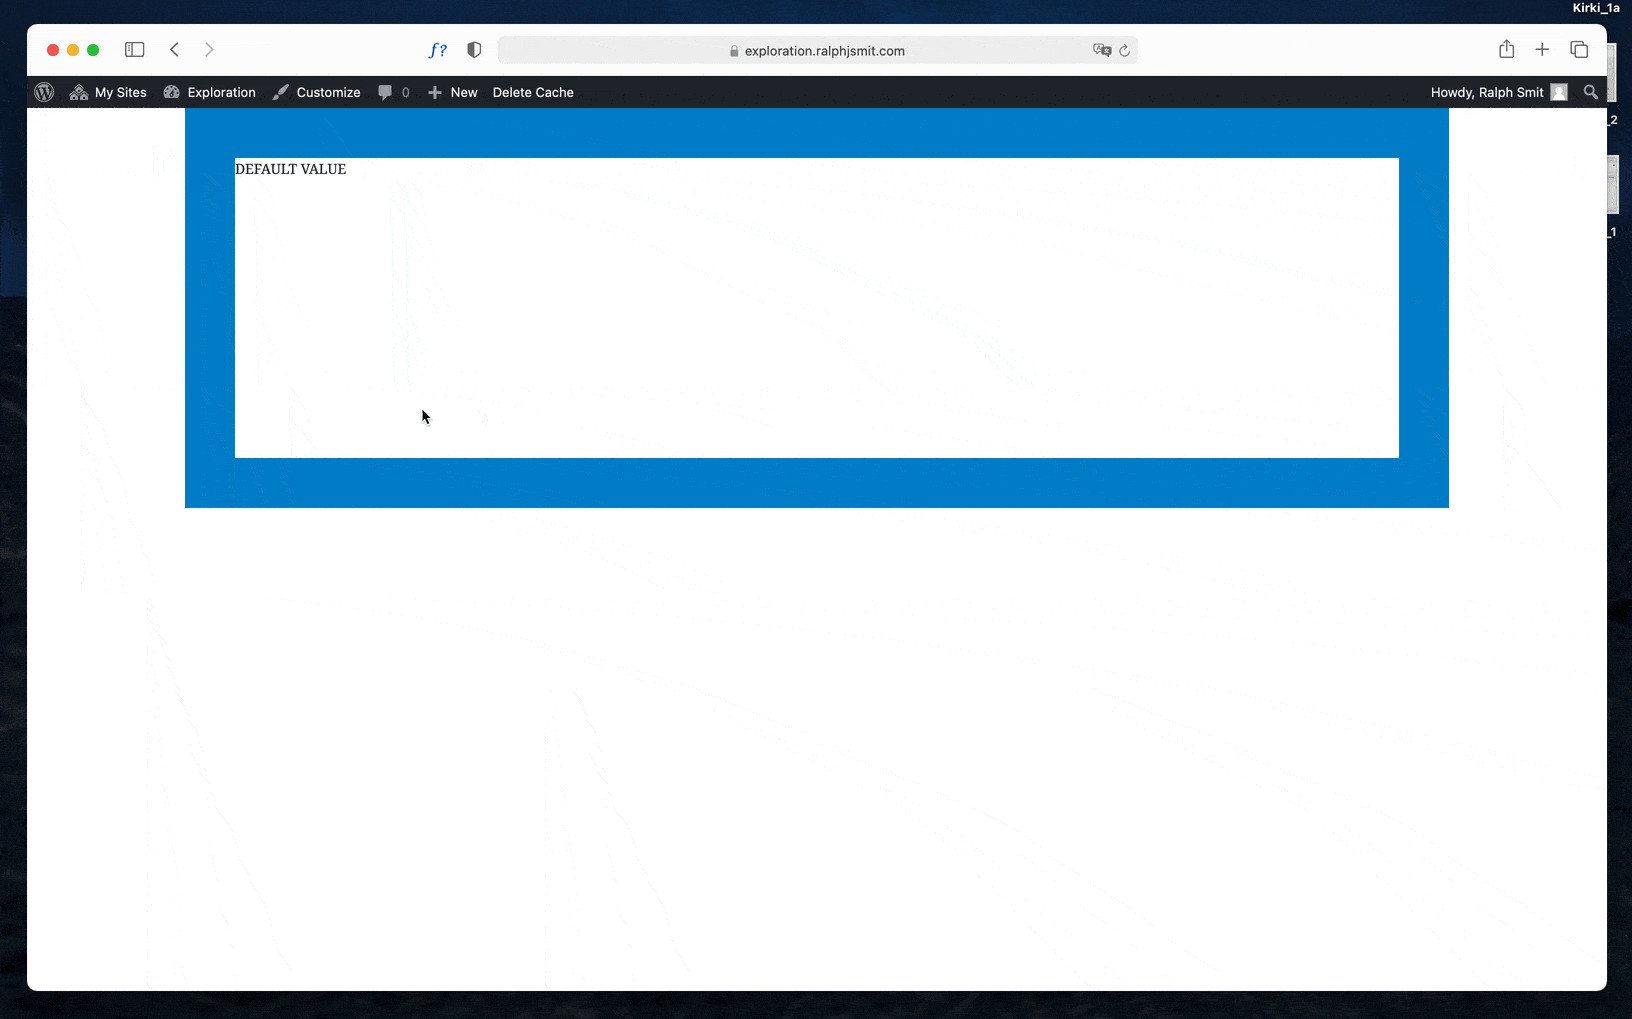
First, we'll retrieve the value from the database with get_theme_mod and save it in a variable. The 'text_setting' is the value for 'settings' in the Kirki field. We also need to add the default value as a parameter in get_theme_mod. This can't be automatically retrieved by WordPress when the value hasn't been changed yet. (The value is only stored in the database after it's edited for the first time.)
Next, we'll echo this value in the right place.
<?php $text_value = get_theme_mod( 'text_setting', 'DEFAULT VALUE'); ?> <div class="kirki-demo" style="width: 80%; margin: auto; min-height: 400px; border: 50px orange solid"><?php echo $text_value; ?></div>
And... boom🔥 You've just created your first text field in the WordPress customizer.
Using the customizer with several Kirki controls is a very pleasant experience.
The full script
Below I've added all the contents of my customizer.php file again for if you just want to see the full script.
<?php //KIRKI CONFIGURATION //General configuration for KirkiKirki::add_config( 'theme_config_id', [ 'capability' => 'edit_theme_options', 'option_type' => 'theme_mod',] ); add_filter( 'kirki_telemetry', '__return_false' ); //Typography panel + sectionsKirki::add_section( 'section_id', [ 'priority' => 4, 'title' => esc_html__( 'Fonts and colors', 'text-domain' ),] ); Kirki::add_field( 'theme_config_id', [ 'type' => 'typography', 'settings' => 'typography_setting', 'label' => esc_html__( 'Automatic Google Fonts control', 'text-domain' ), 'section' => 'section_id', 'default' => [ 'font-family' => 'Noto Serif', 'variant' => '400', 'font-size' => '14px', 'line-height' => '1.5', 'letter-spacing' => '0', 'color' => '#333333', 'text-transform' => 'none', 'text-align' => 'left', ], 'priority' => 10, 'transport' => 'auto', 'output' => [ [ 'element' => 'body', ], ],] ); Kirki::add_field( 'theme_config_id', [ 'type' => 'color', 'settings' => 'color_setting', 'label' => __( 'Border', 'text-domain' ), 'description' => esc_html__( 'Some cool description', 'text-domain' ), 'section' => 'section_id', 'default' => '#0088CC', 'output' => [ [ 'element' => '.kirki-demo', 'property' => 'border-color', 'suffix' => '!important', ], ],] ); Kirki::add_field( 'theme_config_id', [ 'type' => 'text', 'settings' => 'text_setting', 'label' => __( 'Text in box', 'text-domain' ), 'description' => esc_html__( 'Some cool description', 'text-domain' ), 'section' => 'section_id', 'default' => 'Default text',] );
Note: I didn't add a closing ?> tag, because the file only contains PHP content. This prevents a common PHP error.
Conclusion
As you've seen, there's a lot that can be accomplished with Kirki by writing less than 70 lines of code. If you would do this using the WordPress Customizer API, you would need to write hundreds of lines, including extra JavaScript for the postMessage to work.
In the future, I'll certainly write more articles about Kirki and document several other advanced use cases of Kirki. In the meantime, you can check out the Kirki documentation or the other theme development articles on my site.
Published by Ralph J. Smit on in Kirki . Last updated on 10 March 2022 .