Ralph J. Smit Laravel Software Engineer
Many companies are using Slack as their primary tool of communication. Trust me, it will just be a matter of time before you are asked to integrate Slack with Laravel 😉 This will also be relevant if you want to integrate things like the Laravel Horizon or Spatie Health notifications.
Sending messages from Slack into your channels will require two things:
- Set up incoming webhooks (the modern way, without using an the "incoming webhooks" app)
- Send the messages from Laravel
1. Create a Slack app and set up incoming webhooks
The first step is to create a webhook on Slack. A webhook is basically a URL that you can send messages to, and those messages will appear in the specified Slack channels.
Many tutorials advise to use the old and deprecated "incoming webhooks" plugin. Both Slack and that plugin say that the plugin is deprecated, so it will not be a good long-term solution to use that plugin. Therefore, we will follow the official way.
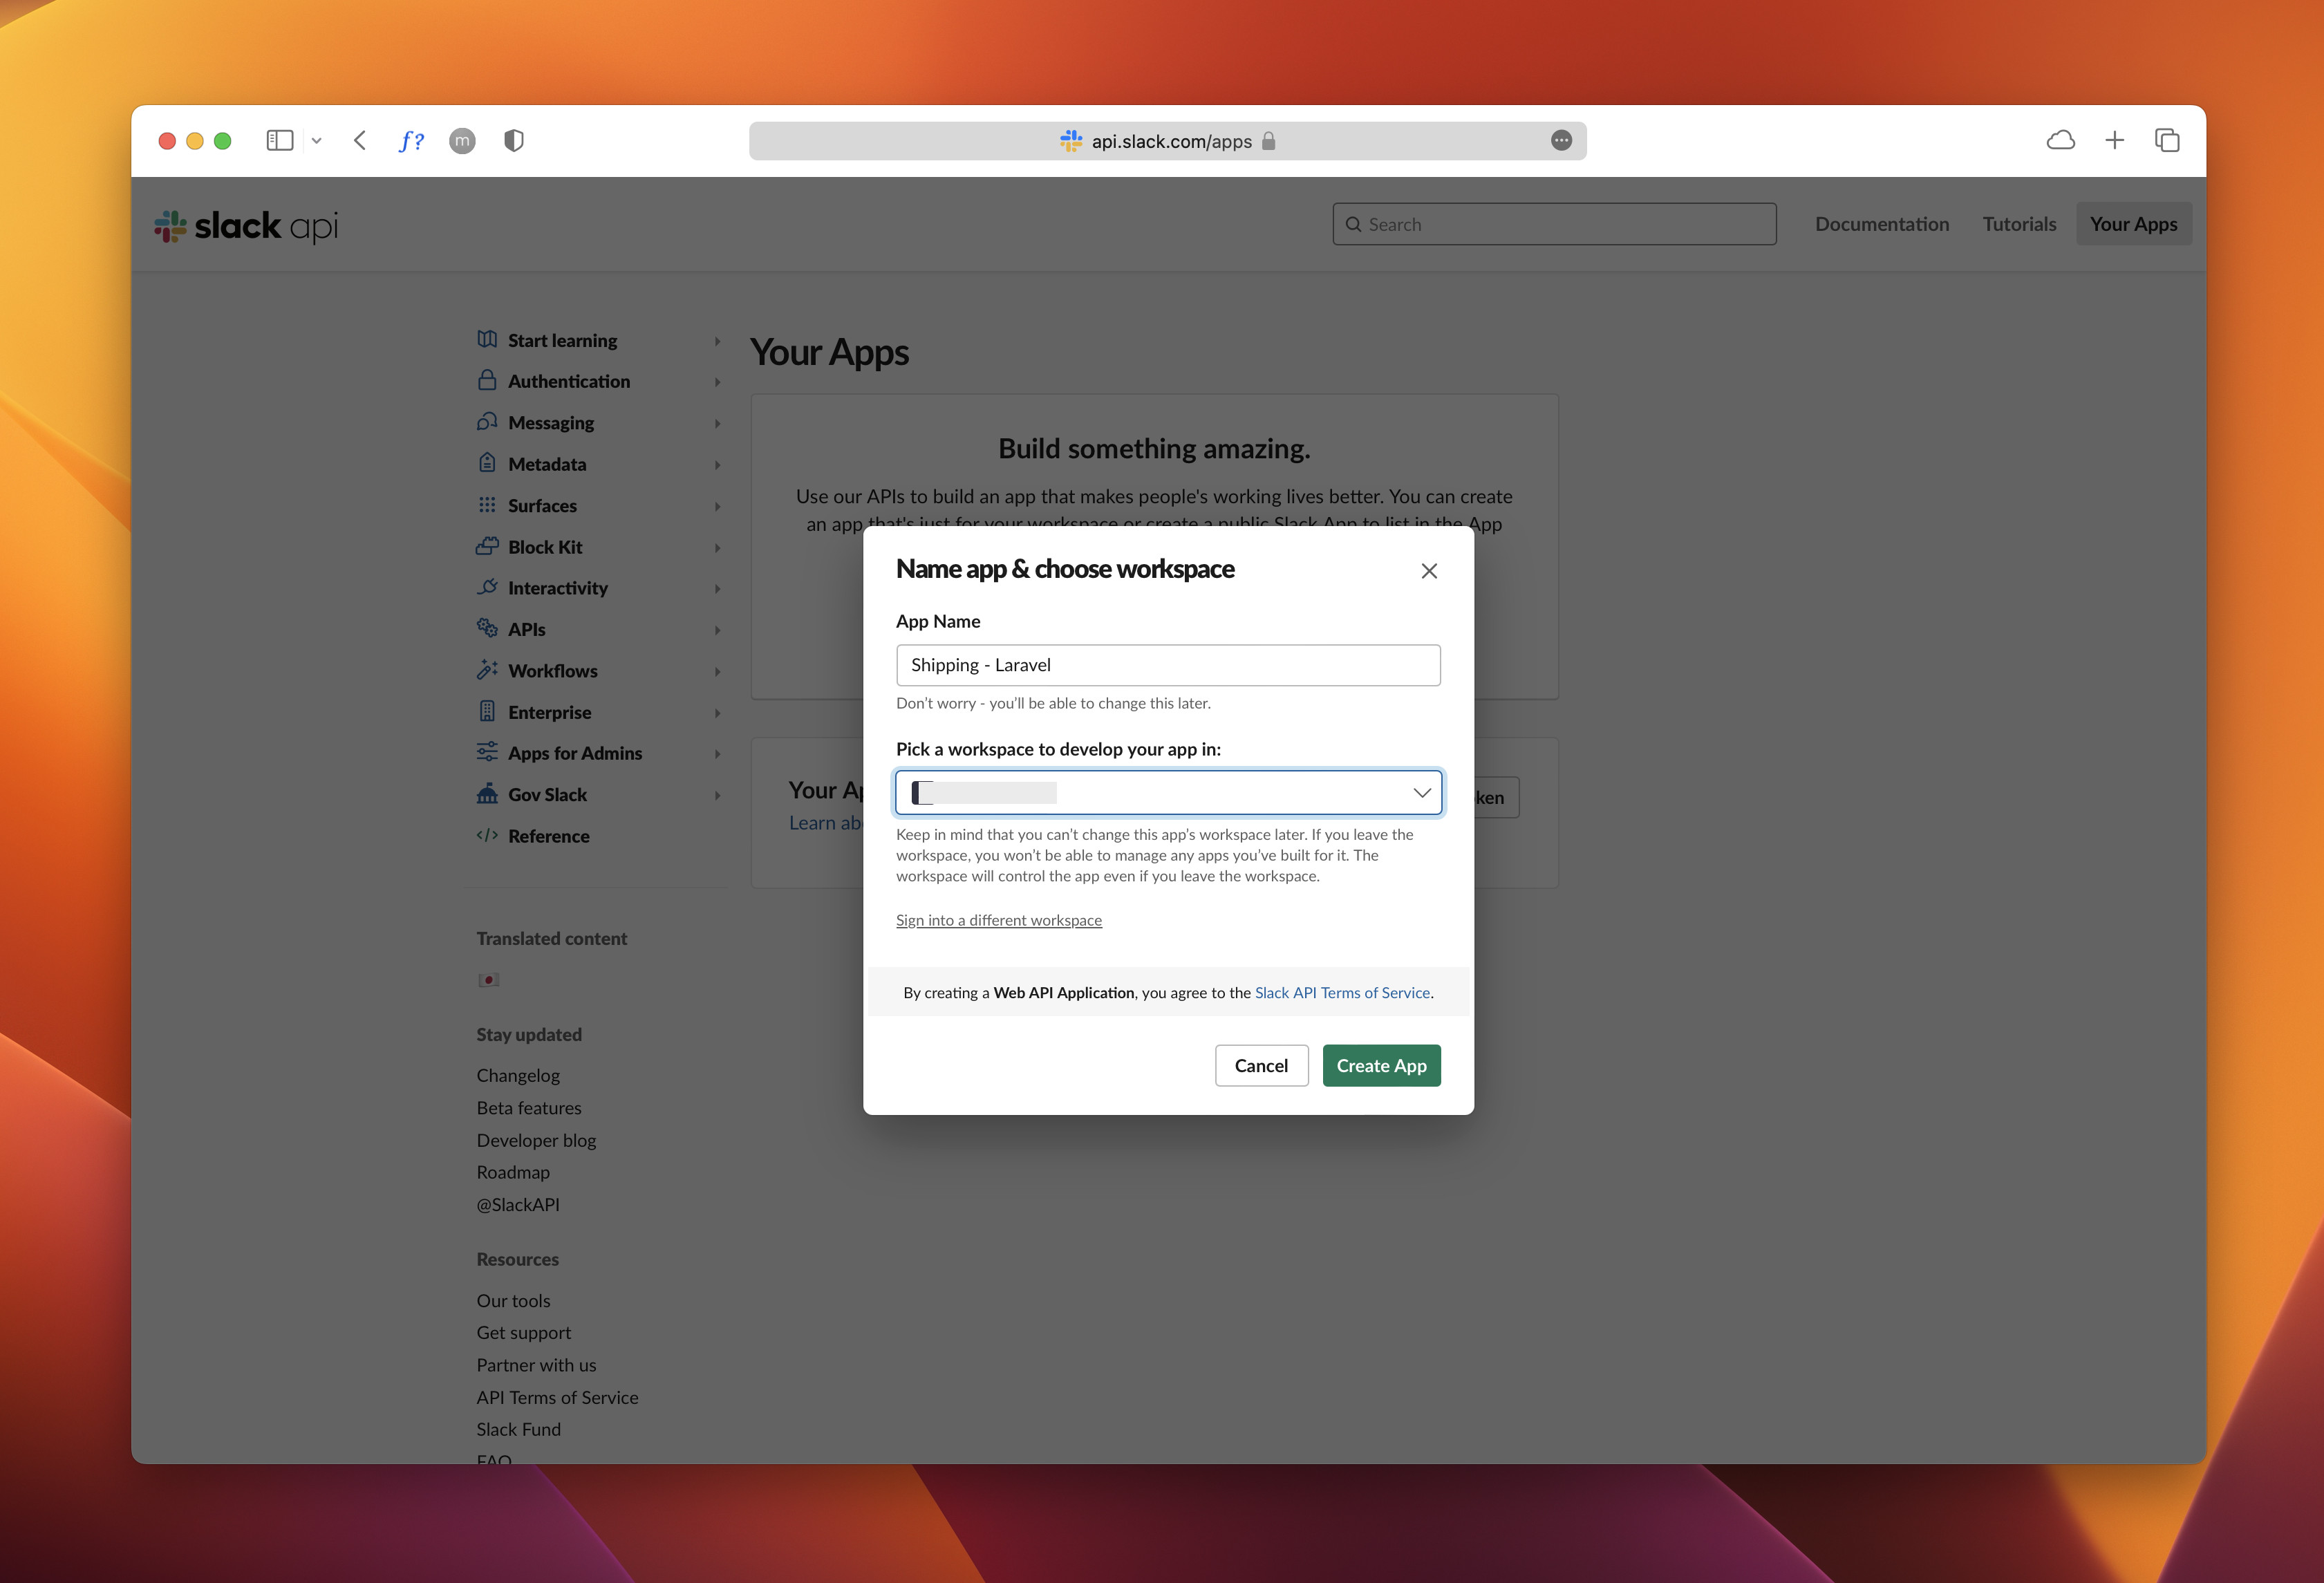
- Go to https://api.slack.com/apps and click on Create app.
- A popup will open where you can select the type of app. I'll select From scratch, since we'll only build a simple app.
- Next, you will be asked to add a name and select a workspace. If you don't see the workspace you want, try signing out of all workspaces and sign in again to the workspace you want to use. Next, refresh the original page and check if the workspace is now selectable.
Next, click Incoming webhooks.
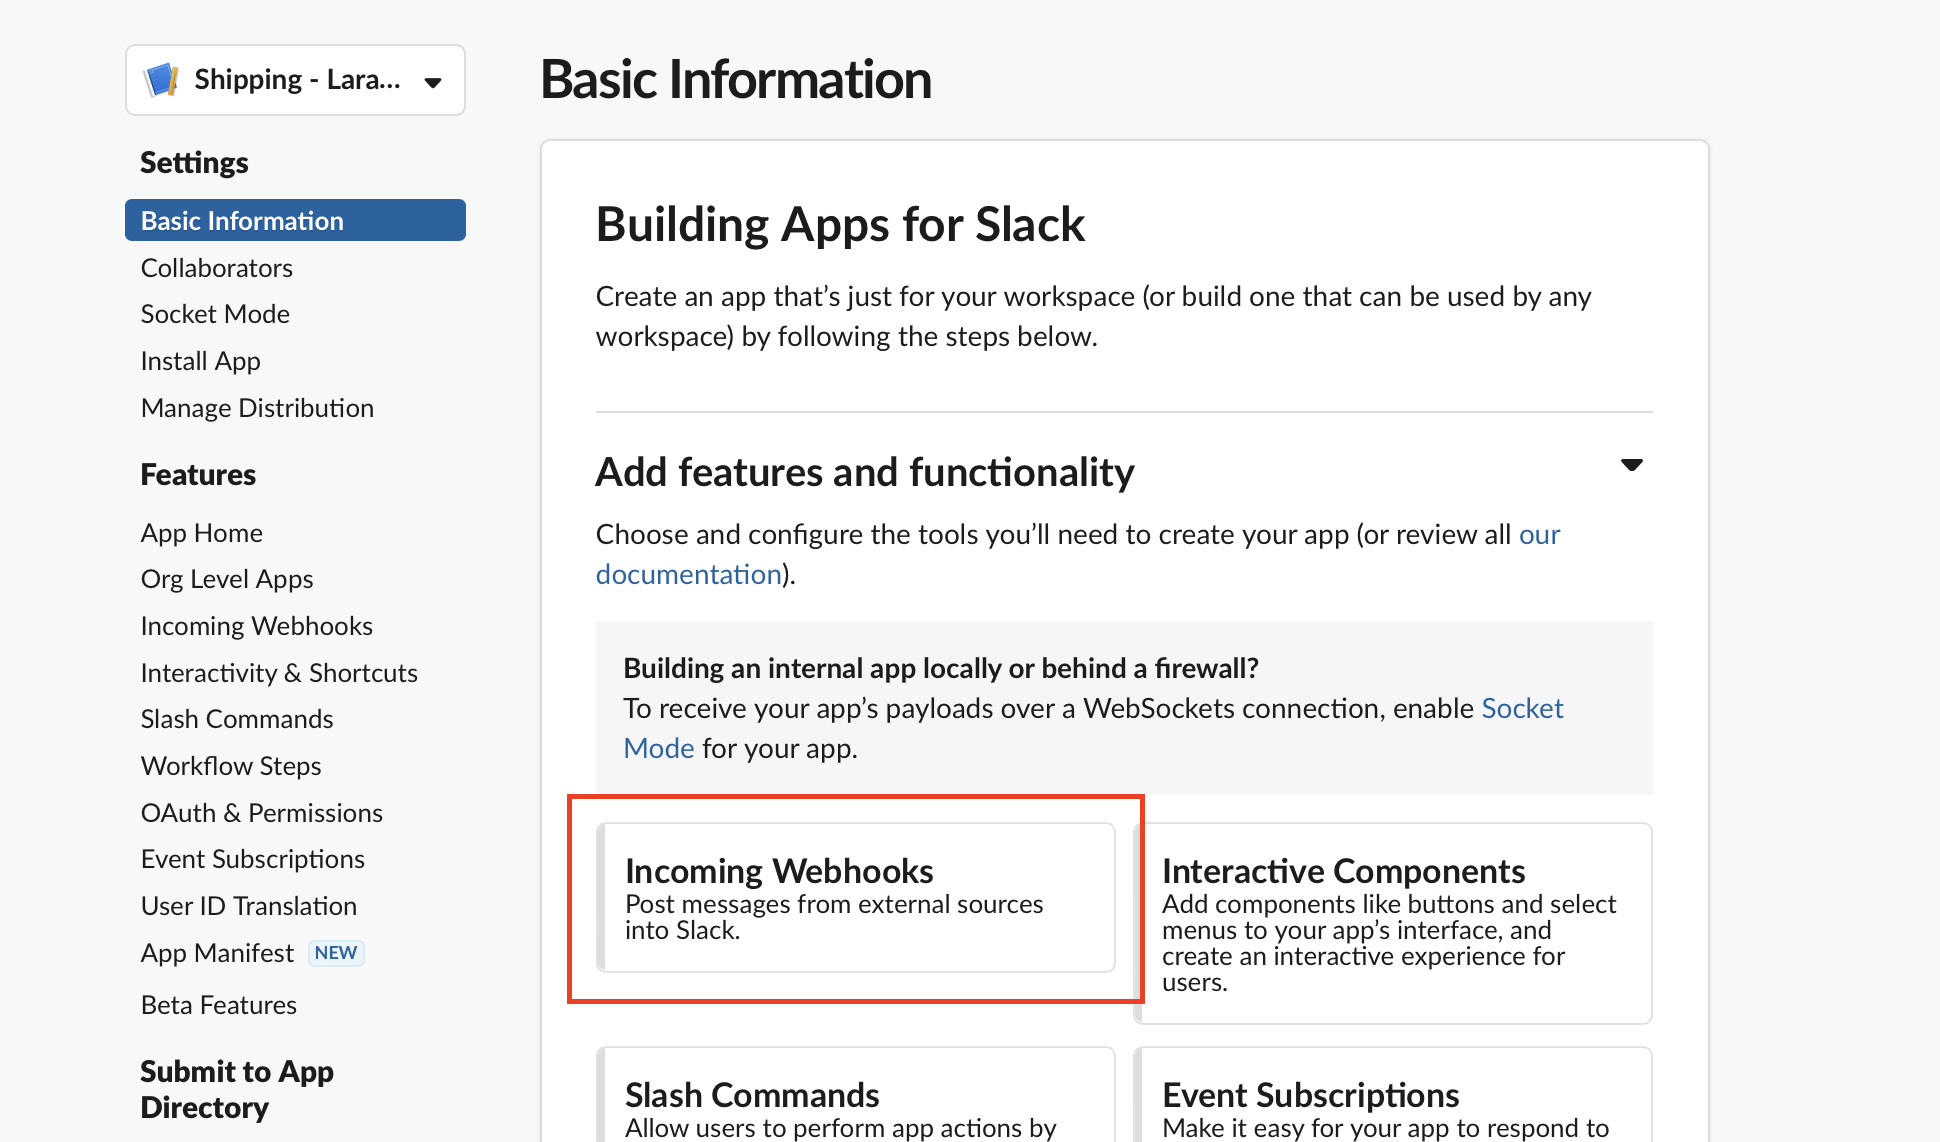
Next, enable the feature by using the switch and click Add new webhook to workspace. This will bring you to a screen where you can select the channel. Select the channel you want and create the webhook. Repeater for every channel to send a webhook to.
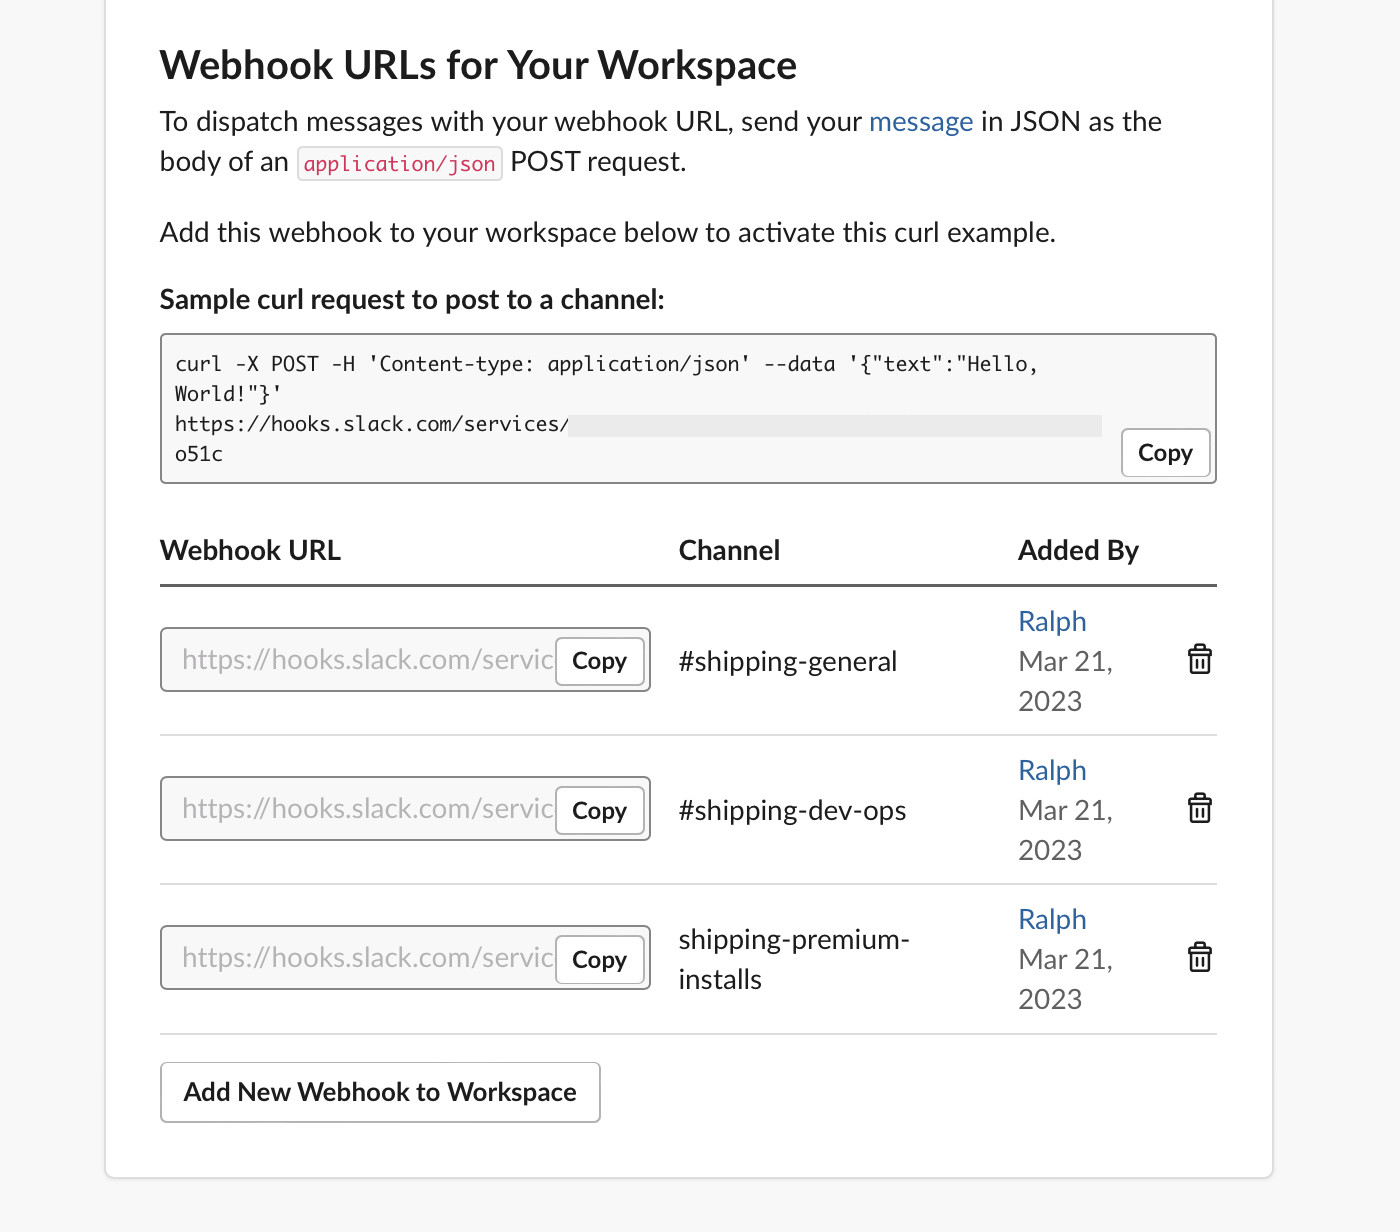
Finally, you should end up with a screen like this:
Can't you create one webhook for all channels?
In the past it was possible to create just one webhook URL that would be able to send messages to all channels. Slack has moved away from that and does not recommend to use the legacy webhook integration. Many tutorials focus on the old legacy integration, but that's not future-proof.
How to customize the sender logo in Slack?
The big advantage of using the new app integration is that you can set more easily a custom avatar image for the webhook messages. To set one up, go to Slack > Your Apps > {select app} > Basic information > Display Information and upload a custom image.
2. Sending Slack messages from Laravel
Next up is the exciting part: actually sending the messages to Slack. ✨ You can do this in two contexts:
- Packages who ask just for a Slack webhook URL and handle the sending themselves (like Laravel Horizon).
- Send custom notifications to your Slack workspace.
In order to use the same webhooks for both, I'd recommend to create a config key for each webhook aka each channel in the config/services.php:
'slack' => [ 'general' => env('SLACK_GENERAL_WEBHOOK_URL'), 'announcements' => env('SLACK_ANNOUNCEMENTS_WEBHOOK_URL'), 'tech-dev-ops' => env('SLACK_TECH_DEV_OPS_WEBHOOK_URL'),],
Next, make sure to add the correct .env variables on production.
Setting up Slack notifications for packages
The first thing we'll do is setting up Slack notifications for packages and tools that handle the sending themselves. In this example we'll use Laravel Horizon.
In the boot() method of a service provider, we can register the webhook for Laravel Horizon Slack notifications:
if ($slackWebhookTechDevOps = config('services.slack.shipping-dev-ops')) { Horizon::routeSlackNotificationsTo($slackWebhookTechDevOps);}
This is all that's to it! We just need to provide the webhook and it's ready.
If there are cases where you need to provide the webhook via another config, you can just reference the correct .env variable there:
// config/some-package.php'notifications' => [ 'slack' => [ 'webhook' => env('SLACK_TECH_DEV_OPS_WEBHOOK_URL'), ],],Sending custom Slack notifications yourself
Next up is sending custom Slack notifications yourself. Laravel has very good support for sending advanced Slack notifications in notifications. However, for notifications, we also need a recipient to send to? That could be an admin or other important user, but since we're talking about a Slack Workspace instead of a user, it would make more sense to create a custom notifiable object that we can use to send notifications to.
In order to do that, you can create a new file in app/Notifications/SlackNotifiable.php or anywhere you want and add the following code:
<?php namespace App\Notifications; use Illuminate\Notifications\Notifiable; class SlackNotifiable{ use Notifiable; public function routeNotificationForSlack(): string { return config('services.slack.general'); }}
Credits for the idea are for Freek van der Herten and/or the Spatie-team, because I dug up this method in one of their open-source packages 😊🙌
Next, create a test notification in app/Notifications/TestNotification.php with the following contents:
<?php namespace App\Notifications; use Illuminate\Contracts\Queue\ShouldQueue;use Illuminate\Notifications\Messages\SlackMessage;use Illuminate\Notifications\Notification; class TestNotification extends Notification implements ShouldQueue{ public function via(): array { return ['slack']; } public function toSlack(): SlackMessage { return (new SlackMessage()) ->success() ->content('Hello world from Laravel!'); }}
Next, send it like this:
(new SlackNotifiable())->notify(new TestNotification());
As you can see, this is very easy! In order to learn how to format your messages, you can refer to the official Laravel docs for Slack.
Sending Slack notifications to custom channels
The final thing that we need to discuss is how to send notifications to different channels. The basic idea is to just swap out one webhook url for another. You can do that by adding a match() statement in the SlackNotifiable class:
class SlackNotifiable{ use Notifiable; public function routeNotificationForSlack(Notification $notification): string { return match ($notification::class) { UserCreatedNotification::class => config('services.slack.announcements'), default => config('services.slack.general'), }; }}
If you don't like putting the logic for the channel name inside the SlackNotifiable class, you can also do it by adding a getSlackChannel() method to each Slack-notification:
class SlackNotifiable{ use Notifiable; public function routeNotificationForSlack(Notification $notification): string { return config('services.slack.' . $notification->getSlackChannel()); }}Wrapping up
As you can see, sending Slack notifications to a custom workspace isn't difficult at all. It just requires the right setup and a basic understanding of how the Slack webhooks work. I hope this article was useful and saved you some time figuring out this yourselves 😀
Published by Ralph J. Smit on in