Ralph J. Smit Laravel Software Engineer
Adding a custom update mechanism to your WordPress themes and plugins is very handy. Unfortunately it's currently quite difficult to do with core WordPress functions. I'll show you how to use GitHub to add your own custom WordPress theme and plugin update mechanism.
So, how will we do this? First, we create a GitHub repository for our theme or plugin files. Then, we'll see how to use this and I'll show you how to version your files. Last, we'll connect the GitHub repository to the GitHub Updater plugin and see how it works. This is what we'll be creating:

The notifications will look exactly like the default WordPress update notifications.
Before we start, do I need to know Git or GitHub?
Using Git is an awesome tool for developers, but you don't need to be an expert in Git to follow along. Even if you've never used Git or GitHub, you can follow the tutorial. However, if you have five minutes, it's a good idea to first follow along with the GitHub 'Hello World' tutorial, where you'll learn everything about repositories, branches and pull requests. But, again, this is not strictly necessary in order to understand the tutorial. Though it certainly makes you a better developer.
Create a GitHub repository
The first thing we do, is creating a GitHub repository. Create a GitHub account if you don't have one. Click New to create a new repository or go to github.com/new.
For the name of the repository, choose the theme or plugin slug. Here, I set the repository to private, something I would recommend if it's a personal or confidential theme or plugin.
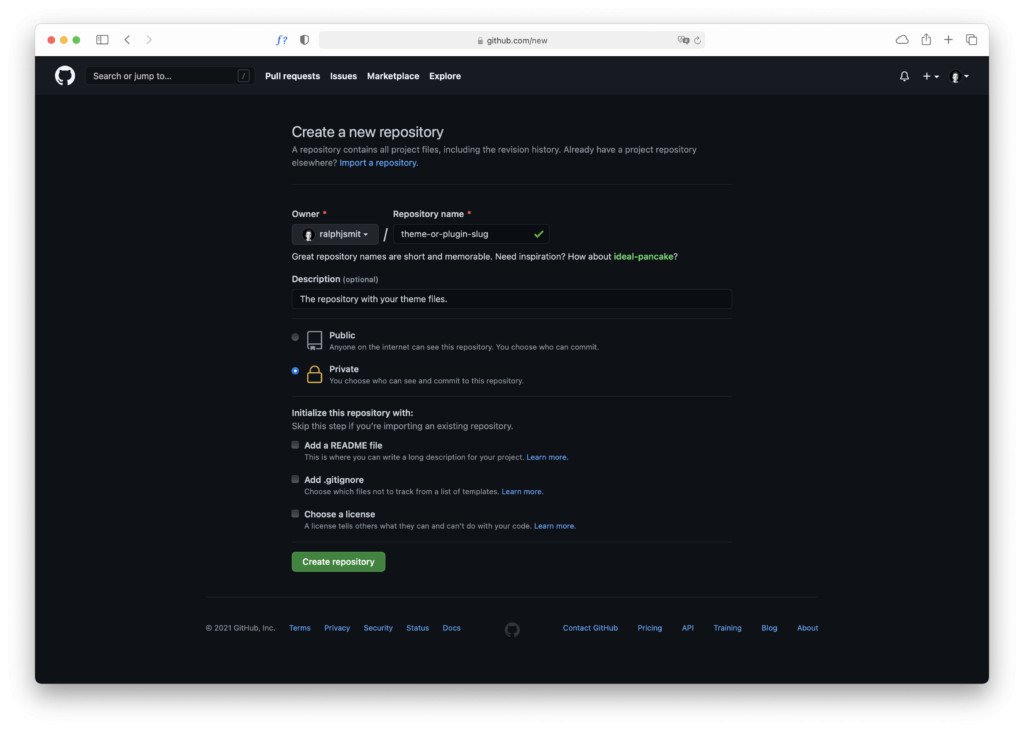
Creating a new GitHub repository.
The GitHub Updater plugin assumes that the main branch of your GitHub repository is called master, rather than the more recent main. You are not required to call the branch master, but this simplifies the process. If you want to change the name of your branch, create a file, click on the branch name, click on View all branches and use the little pencil to edit the name of the branch.
Can I also use other Git services like Bitbucket or GitLab?
Yes, you can. The GitHub Updater plugin supports the following services: GitHub, Bitbucket, GitLab and Gitea. You can also use Gist or provide a link to a zip-file.
Adding the files to the GitHub repository
Now we need to upload our theme or plugin files to the GitHub repository. On the GitHub web version you can't bulk upload files, so to do that, we'll need to use the command line or the GitHub desktop app. Obviously, the later one is somewhat more user-friendly, so I'll use the app for now. Download the GitHub Desktop app
If you don't have the app installed, please follow the installation procedure. Log in and grant the app access to your GitHub account, so that it can download the content of your repositories.

Cloning the repository.
What the GitHub Desktop app does, is adding a copy of the repository to your computer, so that you can edit it. After you've made an update to your code, you can push the changes to the online version.
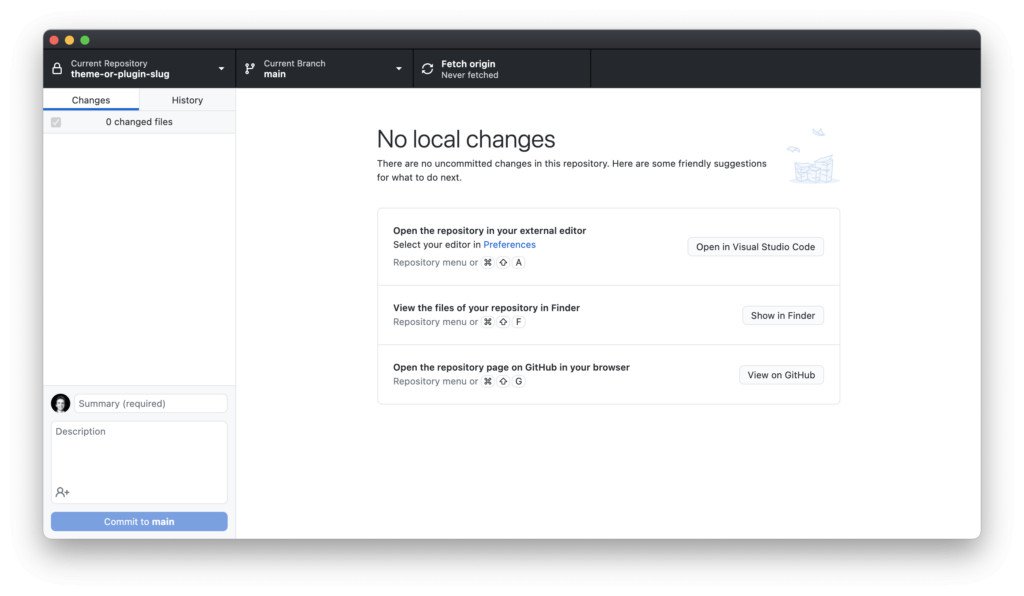
The default interface in the GitHub Desktop app.
Now click Fetch origin if it's not greyed out to make sure we now have the latest version on your computer. Click Show in Finder (perhaps different but similar on Windows/Linux), which opens up your file browser to the folder. The app creates a folder called Documents > GitHub > [repo name] for each repository.
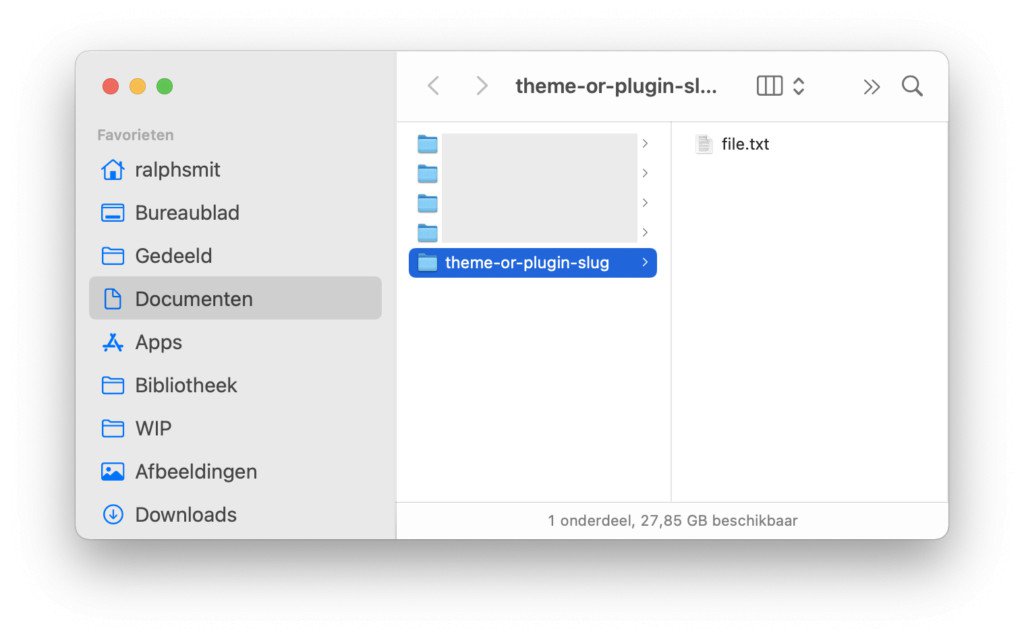
This is the local version of your repository.
Now place the theme or plugin files in the folder. Here, I'll use a WordPress theme.
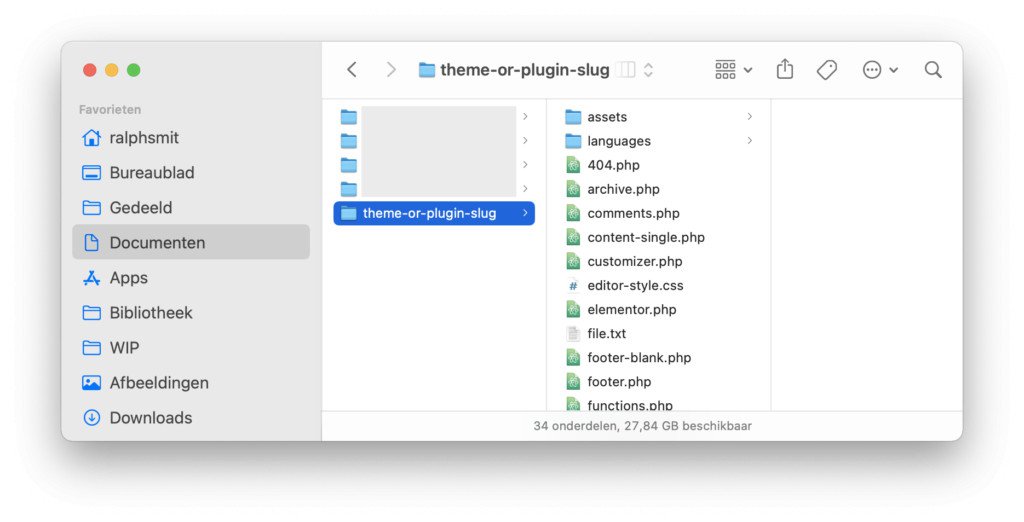
Our full theme/plugin source files.
Now, when you open the GitHub desktop app, you'll see that it has detected the changes.
One of the changes it has detected is the .DS_Store file, which is a hidden file we don't want in the GitHub repo. To do this, we'll exclude the file and then we'll push the new files to the server. Excluding certain files from being uploaded can be done with the .gitignore file. Go to Repository > Repository Settings... > Ignored Files and add the .DS_Store here. Now you'll see that the .DS_Store file is replaced with a .gitignore file, which is perfect.
Add a summary (when you changed multiple files) and click Commit to [repo name].
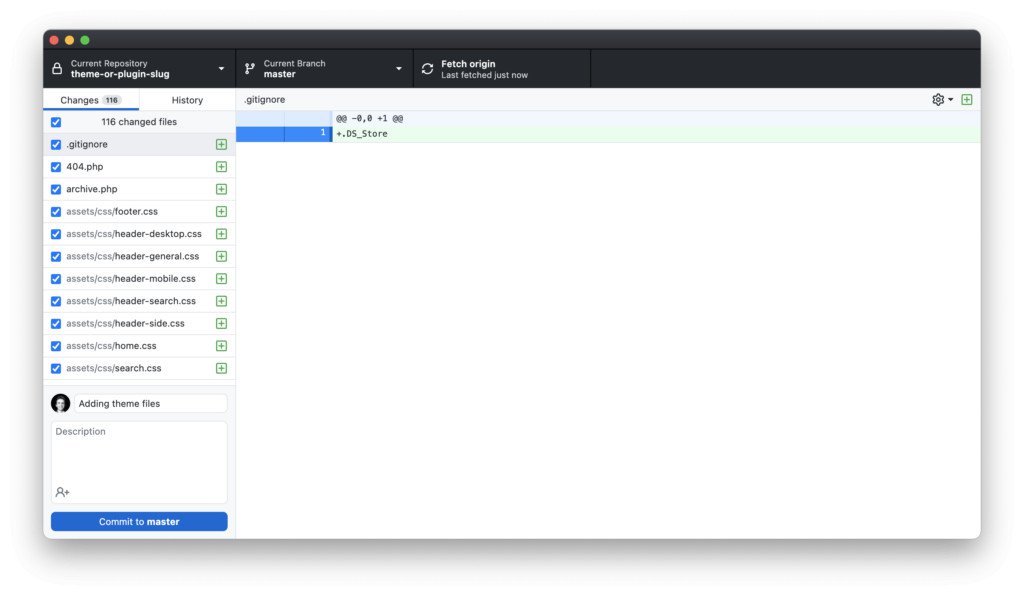
GitHub Desktop automatically detects the changes made and offers to commit them.
Now click Push origin to push the files to the server.
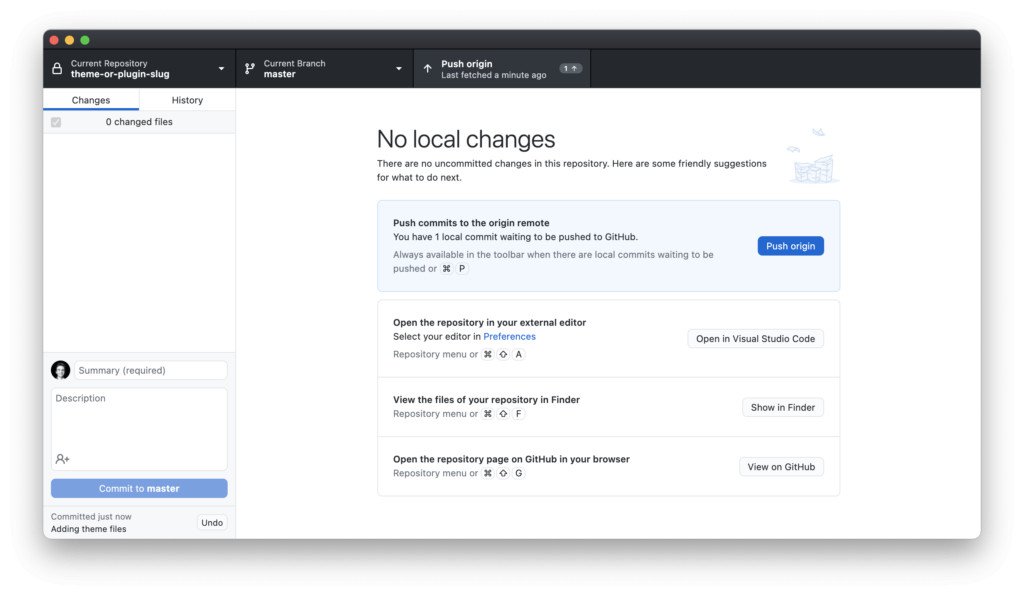
Pushing the local changes to the GitHub server.
Preparing the repository for the GitHub Updater plugin
Now we need to do a little preparation so that the repository can be used by the GitHub Updater plugin. For this plugin, it is important that
-
we declare the repository name in our
style.cssor[plugin-name].php; -
we tag releases;
-
we have the same tag in our
style.cssor[plugin-name].php.
To do this, open the file with the version number in your favourite text editor. I'll use Visual Studio Code.
For themes:
/*Theme Name: THEME NAMETheme URI: https://ralphjsmit.com/github-updater-mechanismAuthor: Ralph J. SmitAuthor URI: https://ralphjsmit.comDescription: THEME DESCRIPTIONVersion: 0.9.3Requires at least: 5.0Tested up to: 5.4Requires PHP: 7.0Text Domain: text-domain*/
For plugins:
<?php/*Plugin Name: PLUGIN NAMEPlugin URI: https://ralphjsmit.com/github-updater-mechanismAuthor: Ralph J. SmitAuthor URI: https://ralphjsmit.com/Description: PLUGIN DESCRIPTIONVersion: 0.9.3Text Domain: text-domain */
Now add the following two lines. Replace 'Theme' with 'Plugin' for plugins.
/*...GitHub Theme URI: username/theme-or-plugin-slugGitHub Theme URI: https://github.com/username/theme-or-plugin-slug*/
Go back to GitHub Desktop. Commit the files and go to History. Here you can add a tag. This tag should be the same as the above version number. I'll call it 0.9.3 here. Click Push origin to push it to the server.
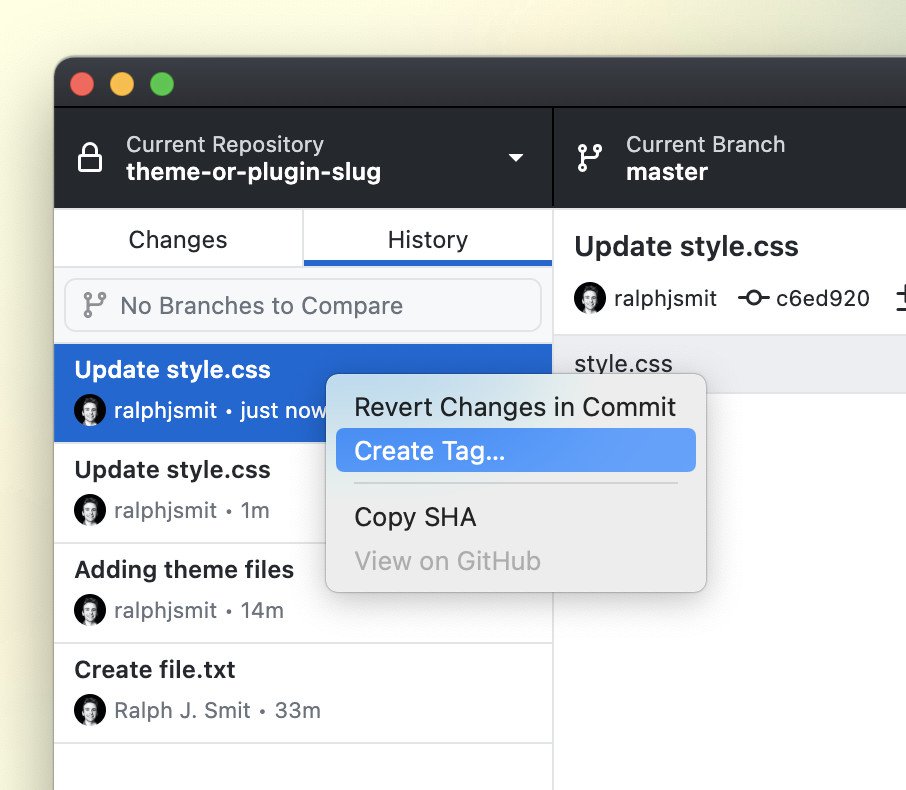
For each version we create a new GitHub tag or do a release (which creates a new tag).
Getting a GitHub API key
The last thing you need, is a GitHub API key so that the GitHub Updater can get files from private repositories. Follow this link or navigate to the page manually:
-
Click on your profile image at the top right and click Settings.
-
Go to Developer settings > Personal access tokens > Create new token.
Create a token with the following permissions:
-
repoand all the 'child' permissions – Full control of private repositories -
read:packages(writeis not needed)
You can give the token a name (called a Note) and then generate it. Make sure to store it somewhere safely.
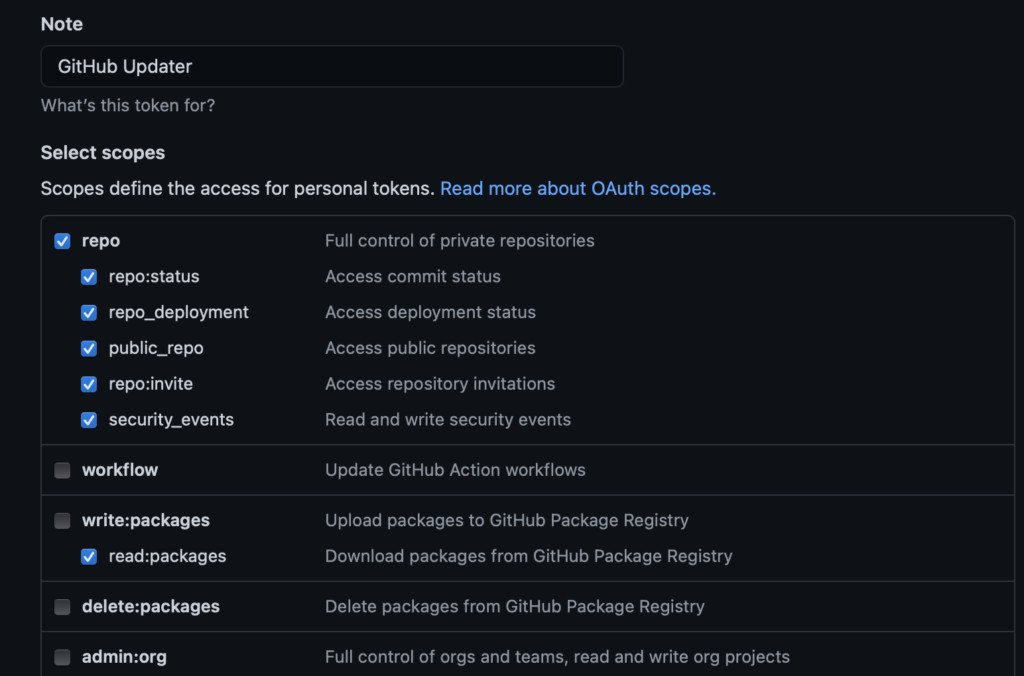
The required permissions for the GitHub API token.
Now, you're ready to go!
Using the GitHub Updater plugin
To get updates for specific themes or plugins, you need to install and activate the GitHub Updater plugin. Download the latest version here. Upload and install it on your website.
Picking the right version
At the time of writing the latest version of GitHub Updater was version 9. Starting from version 9.9.10, the plugin author made some changes in order to monetize the plugin. So if things aren't fully working on a later version, try downloading and using version 9.9.9. This is also the version I personally use.
Now go to Settings > GitHub Updater > Install theme/plugin. Fill out the following fields:
-
**Theme/**Plugin URI: the URL of the GitHub repository
-
Repository Branch: the branch name (can be
master,mainor something else) -
Remote Repository Host: in our case this is GitHub.
-
GitHub Access Token: the API key we just created (only for private repositories)
Click Install Theme/plugin. You can immediately activate it.
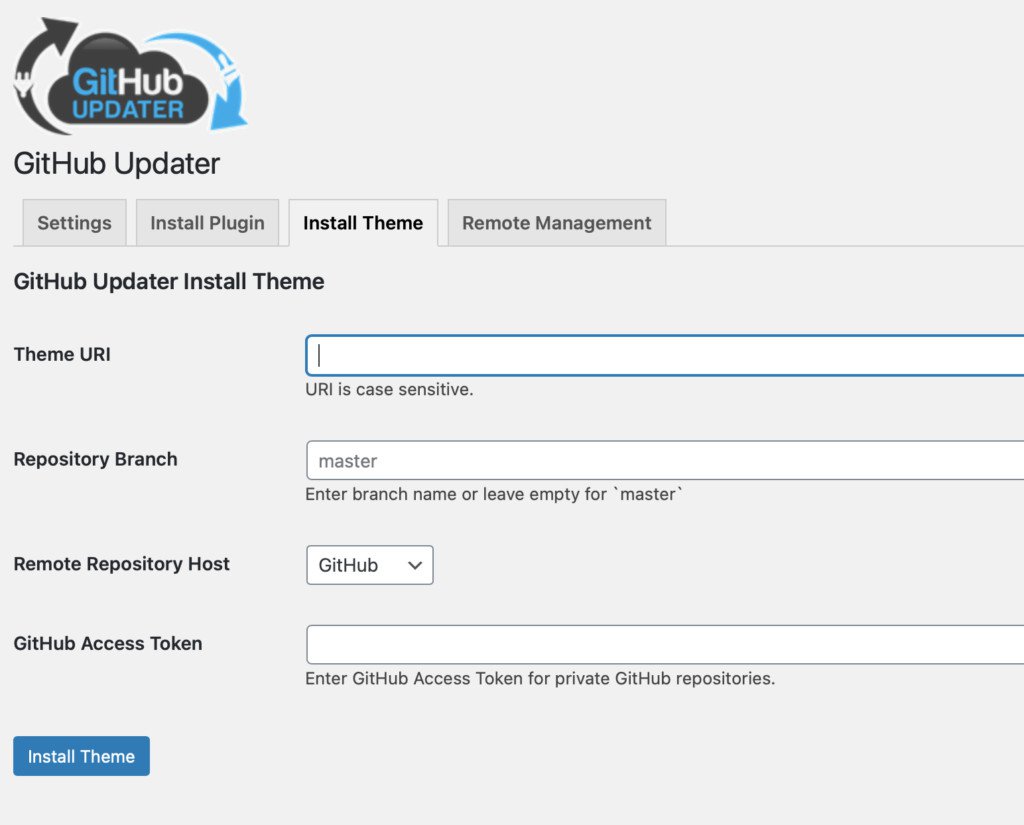
Installing a theme via the GitHub Updater WordPress interface.
Help, the plugin gives an error
It could be that the plugin gives an error in the form of a red warning sign. Try emptying the cache or disabling WP Cron. If the problem persists, you can try troubleshooting it with the Query Monitor plugin. With that plugin, you can inspect the HTTP calls which are made. The GitHub Updater plugin makes a call to the GitHub API. With the Query Monitor, you can normally quickly determine the pain point. Most errors come from insufficient API access or a wrong branch.
Working with the GitHub Updater plugin
Now that everything is configured, how do we use this? Assuming that you make use of the GitHub Desktop app, the working process will look somewhat like this:
-
Open the GitHub Desktop app, select the correct branch and Fetch origin.
-
Make changes to the theme in your text editor.
-
Save changes and commit them. Repeat.
-
Continue to this step when you want to push a new update.
Update the version number in the
style.cssor[plugin-name].php. -
Select the latest commit under 'History' and create a tag with the new version number.
-
Push the changes.
Now, the GitHub Updater plugin will detect when there is a new version. It checks this periodically, so this will not be instantly. As far as I know, data from the GitHub API will be cached for twelve hours. This will be sufficient for most (client) websites and doesn't put any unnecessary strain on the server.
If you need to have this faster, you can manually empty the cache. Doing this makes that the GitHub Updater plugin automatically runs a check. The GitHub Updater plugin also offers a handy RESTful API endpoint. In a next post, I'll show you how to automate this process with GitHub Actions, so that this goes completely automatic and almost instantly.
Can I also use other branches for development?
If you have a more complex theme or plugin or if you have a team of developers working on it, you could make the workflow more professional by using other 'development' branches for development work. You could then merge those branches with the master branch and then do a release or a tag on the master branch. This also works great.
Conclusion & next article
As you've seen, adding an automatic update mechanism to WordPress themes or plugins is very easy to do. By using GitHub, the tool used by millions of developers and their teams, you can simply create your own update mechanism in the style of the default WordPress core update mechanism.
I'll soon write an article about automating this process by using GitHub Actions and the GitHub Updater RESTful API endpoint. Stay tuned ✌️
Published by Ralph J. Smit on in Github . Last updated on 11 March 2022 .